Wednesday, October 23, 2013

Healthy Yogurt Station

After seeing the breakfast bar in my kitchen (which now includes a quick morning oatmeal), Leanne (Away We Go) emailed me to share something similar she does in her home with yogurt.  She created an adorable, functional way to have a healthy yogurt snack with a variety of toppings.  It's great to have all these yummy ingredients on hand and easily accessible.  Here's Leanne to tell you how she did it.

* * * * * 

Yogurt cups have always been a popular snack in our house and over the past few months we have pretty much made the switch to Greek. The health benefits are plentiful and these days the options for flavours are endless! I absolutely love the individual containers that include a portion of toppings to add in.  I find the combination of nuts, granola or even dark chocolate to be a very satisfying late afternoon snack!  However, as much as I love these little treats, I do find their cost adds up. In order to save a bit of money, but keep this healthy option in our kitchen I decided to put together a little Yogurt Station. 


To get started, I gathered a variety of nuts, seeds and dried fruit from the bulk section of our grocery store and placed them in some glass jars that I already had on hand. 


I placed a washi tape label on each jar to identify it's contents. I think that washi tape is great for this job because it can easily be switched out as the contents of the jar change.  


The jars fit nicely in this small basket, which is a perfect fit for our pantry shelf.  


Here is a list of what I currently have in our "Yogurt Station"
~
roasted almonds
 candied pecans
dried cranberries
shaved dark chocolate
 pumpkin seeds
honey
cinnamon


Now I am able to buy large tubs of Greek yogurt, which saves money and waste (the individual servings are often too large for my kids). When we need a little snack we grab the basket from the pantry and top our yogurt to fit our mood! I love granola and honey in the morning, and pecans with dark chocolate before bed!


Thanks so much for sharing Leanne!  I adore the jars and washi tape labels too! - Megan

* * * * * 

If you have a healthy food recipe with bright, gorgeous photos and would like to be featured on Honey We're Healthy, email me at: honeywerehealthyblog@gmail.com


Monday, October 21, 2013

Vitamix Blender- Worth It?

Last year I was considering purchasing a Vitamix blender and then was shocked to see how expensive they were when I visited the website.  I was so naive about the price!  I wrote about it on Honey We're Home, asking people if they thought the Vitamix was worth it and got a lot of responses, mostly people encouraging me to make the splurge and others saying blenders that sell for much less will do the job fine.  I was still on the fence when I was at Costco one day and they had a Vitamix 5200s on sale (but now I can't recall the exact price) so I went ahead and bought it.  Amazon sells a Vitamix5200s for $449.99 ($100 less than the Vitamix website).

I have to say I love it!  I mix protein smoothies in it almost daily and they contain ice and frozen fruit, which blend up perfectly.  Perhaps a less expensive blender would also work, but I'm confident this one will last a very long time- it comes with a 7-year warranty.  


I will say, the downside of my Vitamix blender is it's height- it won't fit on the counters under our cabinets because it's too tall.  We tend to keep ours out near the kitchen sink because we use it so often, and store it in a lower cabinet where it fits fine.  I just rinse it with hot soap and water right after each use, and lay it upside down to dry.  

One feature I really like is that it's not that loud compared to other blenders I've heard.  Now, I want to venture outside of just making smoothies.  I know you can make soups, dips, salsa, and have even heard of chicken salad and dough.  

Do you have a Vitamix?  I'd love to hear what you are making in your blender besides smoothies.  

I'm considering pureeing up some veggies to sneak into my son's food (maybe into his blueberry muffins or something like that).  Any recommendations? He's the pickiest eater I've seen!

* * * * * 


Saturday, October 19, 2013

Faith

Worship and worship music is a huge part of my expression of joy, thankfulness, faith, and love of God.  I enjoy different kinds of worship music, listen almost exclusively to contemporary Christian radio in my car (89.3 KSBJ), and sing in the choir at my church.  I often feel the closest connection to God and His peace and love in my times of worship.  Many tears of both joy and heartbreak have fallen during my worship time.  Only He really knows everything we've been through.  But, I almost always feel a deep sense of peace after a pure time of worship when I didn't hold anything back.  To me, worshipping through music is pouring out your heart to God through the songs and acknowledging Him as Lord.  Then, feeling His responsiveness and connecting to it.  It blesses my soul. 

When I first joined my church in 2001, the song I recall getting me "hooked" on contemporary worship music was "You Are Good" by Isreal Houghton.  Do you know it?  We actually just sang it again two weeks ago and it's as good as I remember.  It's really upbeat and FUN!  Gets you moving and dancing and just celebrating the genuine goodness of God.  Did you know that worship music could sound like that and that some people dance and jump at church?  I didn't.  

Here's a video of Isreal and his band New Breed signing You Are Good and Rejoice in South Africa.


Certain songs in life just take you back- they don't even have to be Christian songs- to a certain time in life and you can almost taste the experience.  I vividly remember how I felt as a "baby Christian" going to church regularly for the first time as an adult, completely ignorant of Christian music and definitely feeling a little . . . weird about even hearing lyrics like, "I worship you Almighty God, there is none like you." And I felt really out of place because I didn't know any of those songs.  I was more familiar with My Love Don't Cost a Thing (it was 2001 after all).  At church, I was self conscious and awkwardly clapped my hands to the beat of the music, but my mouth was shut tight.  

Slowly over time, as I continued to show up on Sunday mornings, the songs became familiar.  I bought our church worship CD (or maybe it was given to me?)  and started listening to it in the car.  At church, I looked forward to my "favorite" songs being played.  It wasn't long before I knew ALL the words and was sining in my car.  Then, the girl who used to keep her mouth shut, auditioned for the choir. When I look back now, I realize I didn't need to feel self-conscious about not knowing the songs (I doubt anyone even cared or noticed).  We all start somewhere in our walk with God.  What matters is just starting and knowing that HE IS GOOD!

Do you have a favorite worship song?  

* * * * * 

Wednesday, October 16, 2013

Kitchen Must Haves

Over the years, I have definitely found my "must have" kitchen items that I use over and over and that are essential to preparing healthy meals.  If you're going to go to the effort to cook meals at home, having these tools on hand will get you through most recipes.  And, you don't have to spend a fortune on these things.  I sourced all of these products through Amazon (which has great prices on quality products), and I know that many people use the site because it's such a big time-saver and the convenience of having things delivered right to your door is hard to beat!  

These items may not be as inexpensive as you would find at Wal-Mart, but the prices are great for the quality at Amazon.  Since cooking and preparing meals is a daily chore, you want your tools to last and be easy to use.  I have all of these items in my kitchen and can attest to their quality and usefulness. Because I'm simply a home cook who still has a lot to learn, I do not have the "best of the best" chef's cookware, but I consider these items very high quality for a good value. 


8-inch knife //  This one knife, if you keep it sharp, will make preparing meals so much more enjoyable.  So many of my meals start with dicing up an onion and then chopping up fresh herbs.  

Serrated knife // Essential for tomatoes, which we eat often, and also for bread. 

Cutting board //  One really nice cutting board, like the Boos brand, will last forever if you care for it by handwashing and oiling it regularly.  I like a cutting board with a very large surface area so I can chop different foods and keep them on one board.  The one pictured is 24x18, but smaller ones will be less expensive.  

Peeler // I'm forever peeling carrots and cucumbers.  I hate peeling potatoes, but if I have to, this is the peeler I like to use.  I've had mine at least 5 years and it's still going strong.  It's dishwasher safe too.

Can opener // I use a manual can opener to save counter space and keep it in a drawer (as opposed to an electric opener).  This one works really well and you don't have to be superwoman to use it.  Just be sure to clean it after using so the blade doesn't get stuck. 

Mixing bowls // One set with a few sizes is all you really need for both meal prep and baking.  I keep one handy as a garbage bowl for all the garbage/recycling as I'm preparing my meals.  

Spatula // A four-inch stainless steel spatula is good for turning almost anything and I feel it is sturdier than its rubber counterparts.  I also use it for separating meat while cooking like ground turkey for chili or my Tex Mex dish.

Grater // Again, I opt for a one sided microplane grater (as opposed to a box grater) to save space. I mostly use mine for cheese. 

Wooden spoons // There's always something to stir or mix.  

Rubber spatulas // I call them rubber spatulas, but they are really made with silicon.  They are great for helping empty the contents of a jar or bowl and are heat resistant so you can use them when stirring hot things on the stove. 

3-quart pot // The smaller, nonstick pot is good for steaming veggies and boiling smaller amounts of pasta. It's dishwasher safe, but I always hand wash mine for extra precaution.

10-inch pan  //  I use this for cooking everything from meat to pancakes and omelets, and for sauteeing veggies.  I've made a million grilled cheeses in this pan.

5-quart pot // Perfect for chili, stews, and soups.

A few more things not pictured that I also use all the time and have in my kitchen:


 plastic measuring cups

stainless steel measuring cups and spoons (These are a splurge.  They were a Christmas gift from my girlfriend Karen a few years ago and I love how they feel in my hand.  Such a crazy good gift!)

What's YOUR must-have kitchen item? 

* * * * * 


Monday, October 14, 2013

Healthy Coleslaw

Cole slaw is a great side side dish that's a wonderful additional to so many meals.  I particularly love it with barbecue and made it as an addition to slow cooked pork shoulder last week.  To make a healthy cole slaw, I used the America's Test Kitchen  Healthy Family Cookbook recipe, which uses buttermilk, light mayo, and lowfat sour cream.  The result is less calories and less fat- a 1-cup servings has 70 calories and 2 fat grams.  Note that this recipe takes about two hours (non-work time) before it's ready, so plan accordingly.  You can also make the coleslaw ahead and refrigerate in an airtight container up to one day.  Just taste before serving- you may need additional cider vinegar, salt, and or pepper. 
INGREDIENTS
1 head cabbage (cored and sliced thin)- I used a bag of prepared cabbage and carrot mix
2 carrots, peeled and shredded 
1 teaspoons salt 
1/4 teaspoon pepper
1 cup buttermilk
1/4 cup light mayo
1/4 cup lowfat sour cream
3 scallions, sliced thin
3 tablespoons minced fresh parsley
2 tablespoons cider vinegar
1 tablespoon Dijon mustard
1/2 teaspoon honey

DIRECTIONS
1.  Toss the cabbage with the salt in a colander and let it sit for an hour until wilted.  Rinse and drain the cabbage in cold water and dry thoroughly.  Then add in the carrots.  (Cabbage is naturally full of water which will end up watering down your cole slaw thus dulling its flavor unless you draw out some of the water first.  Salting and draining the cabbage releases most of its liquid resulting in crisp crunch and better flavor.

2.  Whisk all of the other ingredients in a bowl until smooth.  

3.  Pour the dressing over the cabbage mixture and toss to coat.

4.  Cover and refrigerate until the flavors have blended (about an hour). 


* * * * * 


Saturday, October 12, 2013

Faith

I have quiet confidence that God knows what is best for my life and that He has a plan and purpose for me.  I'm earnestly seeking to know, "What would YOU have me do?" There have been many times in my life when I had dreams and hopes that did not come to fruition and, at the time, was utterly and painfully depressed that God wasn't giving me what I wanted- what I pleaded and prayed for with all my heart.  But HE knows better.  No, HE knows best.  He sees what we cannot see.  It doesn't always numb the pain, but I also believe in feeling your feelings and allowing them.  Then, we can deal with it and heal it.  I'm taking comfort in Proverbs 19:21 today.  The NIV translation says, "Many are the plans in a person's heart; but it is the Lord's purpose that prevails."


Just like I believe there is a certain peace and comfort in having a man be the head of the household (a somewhat controversial topic I know), there is a big sense of relief knowing that I don't have to figure everything out on my own.  I can give situations to God and seek HIS will and then patiently (oh, that one is so hard) wait to hear from Him. Sometimes we "hear" by doors opening or closing or by certain people coming or leaving our paths.  But, I TRUST in Him and his purpose.  Thank God for that peace.  

* * * * * 

Wednesday, October 9, 2013

Homemade Pesto Pizza

Had I known sooner how easy it is to make tasty pizza at home, I would have started making it so much sooner.  My best friend Karen and her husband are wonderful cooks.  Many years ago, we used to do a rotating Thursday night dinner club where we'd take turns eating at each other's houses.  I always looked forward to the Thursdays when it was their turn to cook! Karen often shares her recipes with me and this homemade pizza is one of her latest.  She texted me the pics of her pizza with directions and I knew immediately I wanted to try it. 

She said she was still experimenting with cooking temps and times, but I read that the trick to cooking pizza at home is to get the oven very hot (500 degrees) and heat the pizza stone (I used a baking sheet) to very hot as well by preheating it in the oven for at least 30 minutes.  I did that with this thin-crust pizza and baked it for about 12 minutes.  It turned out so good!  


I think the thing that intimidated me before about making pizza at home is the crust.  But Karen recommending buying frozen premade crust and just rolling it out.  


I bought my dough at Whole Foods, but I know they sell it elsewhere.  My package comes with two frozen dough balls that you thaw in the fridge for a day or on the counter for about an hour or so.  I rolled the dough with olive oil so it wouldn't stick. 


This is a pesto pizza with spinach, mushrooms, red pepper, mozzarella, a little feta and a couple cloves of garlic.  I steamed the spinach on the stove, then made sure to squeeze any excess water out.


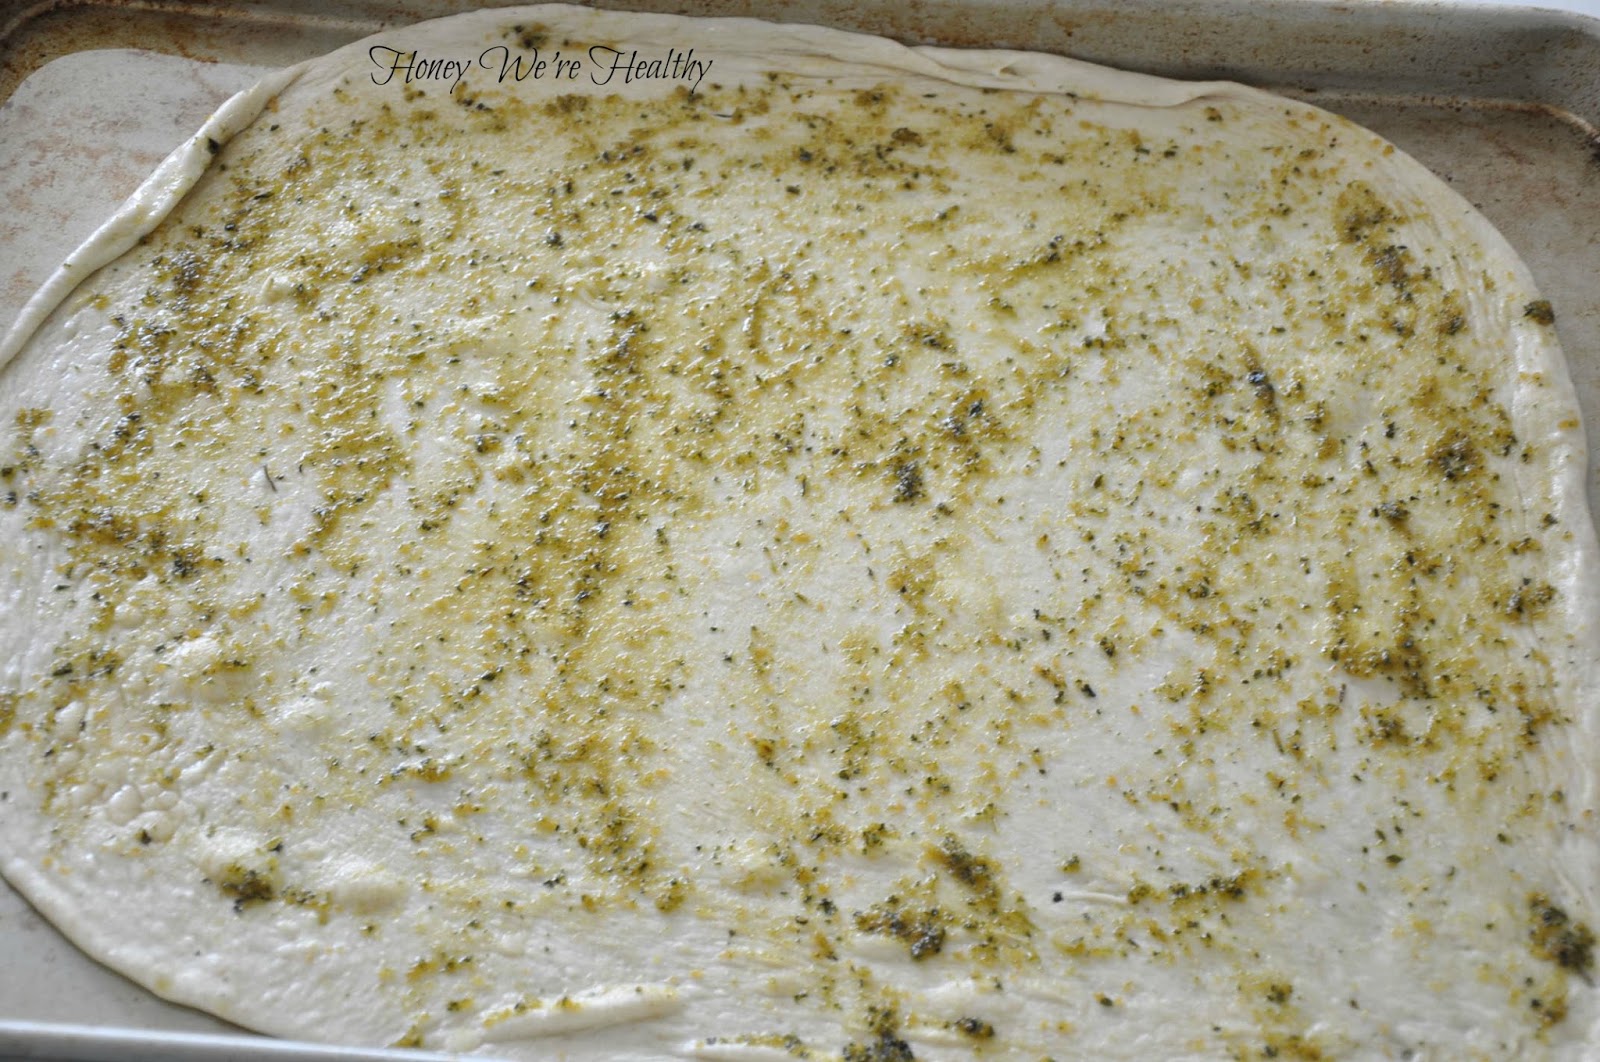
Mix the prepared pesto with a couple drops of olive oil so it spreads easily onto the rolled dough. 


Then top with all the ingredients.  


Like I mentioned above, I preheated the oven and cookie sheet for about 30 minutes at 500 degrees.  The pizza baked for about12 minutes. 


I will definitely be making this again.  It will be fun to experiment with different variations of ingredients too. 


Do you make pizza at home?  What are your favorite toppings?

* * * * *